|
Requirements: regular image editor such as Paint Shop Pro or Photoshop and basic knowledge of said program What is a manipulation? A manipulation is when you take an image and change it around so it looks realistically (we hope!) like something else. For example, you could take a picture of a regular girl and give her long Renaissance-looking hair, wings, and a filmy dress to turn her into a fairy - that would be a manipulation. With the lack of new LotR character stills, it can be fun to take a picture of a LotR actor or actress and turn him/her into his/her character. In this tutorial, we will turn Miranda Otto into Eowyn. Let's start with this picture of Miranda. Open up the big version of the picture, paste it into your image editor, and make a mental list of what needs to be changed. Her dress is obvious--we'll need to give her something Rohirric. Her hair is another aspect that needs to be manipulated--it's not wavy enough, it doesn't look Eowyn-esque parted on the side--her skin is a bit tan, and the background looks too tropical for Middle-earth. Otherwise it's a good image :) Let's start with getting rid of the strand of hair across her neck. Use the clone brush tool for this. For the hair close to the dress, use a size of about 25 and opacity of 100. Right-click on an area of the edge of the dress that looks like how the edge should look without the strand of hair, and then left click over the hair. Keep doing this (try right-clicking in other places too - don't use the same clone source for everything) until the edge of the dress is cleared of hair. Then move onto her skin, doing the same thing (it will work better if you use a larger clone brush, around a size of 45). The area you cleaned up should look something like this when you're finished:
Excellent. Moving on! The dress should be our next area of focus. As with any manipulation, the trick is finding an image where the character has a very similar body position (it helps [if you're making a LotR manip, that is] if you have a thorough knowledge of lots of the movie stills that were released). Otherwise, you'll spend a lot of time looking through galleries to find the proper image. It is possible to piece together a costume even if the original body positions are dissimilar, but it's a lot easier if you don't have to do that. As it is, Miranda's position in this picture is relatively straight, so it shouldn't be too hard to find the appropriate picture. Looking through my collection of Eowyn pictures, I can see that there are several that might work, in particular ones of Eowyn in her shieldmaiden outfit. For now, we'll try this one. The first thing to do is make sure the size is right. It looks a bit too big right now, so let's resize it to 700 pixels wide (and whatever pixel measurement corresponds to this width). Copy it and paste it over Miranda, promote it to a layer, and (it helps if you have your layer palette open for this), slide the transparency bar down to about 65 so you can see how the dress looks over her. Try to match the shoulder areas. It's evident that the body positioning doesn't look quite right, so try mirroring the image and repositioning it. Better! The position is still a little off, though. This may prove to be a bit tricky! If you line up the left shoulder, it looks good, but the right shoulder is way too high. The positioning should look something like this right now:
Drag the opacity back to 100 so we can start making the dress realistic. Start erasing around the outline of the dress. You don't have to do a particularly thorough job right now. Stop when it looks about like this:
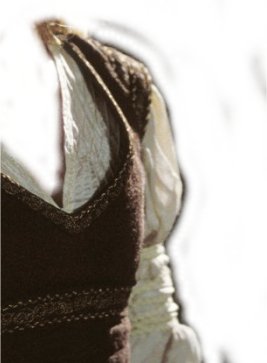
As you can see, we need to do something with that right shoulder. Using the square selection tool with the feathering set to 0, crop out a rectangle that looks about like this (except the white will be transparent):
And copy/paste it as its own image. Go to Effects >> Geometrical >> Perspective - Horizontal. Set it to 65. Go back to the original image and undo the selection. Erase the right side of the dress, or at least most of it (right around the V-neckline). Go back to your copied-perspectified half-dress. Resize it to about 300 px wide. Copy it, and paste it back onto the original image. Promote it to a layer and do a nice erasing job around the left edges so it blends. Like this:
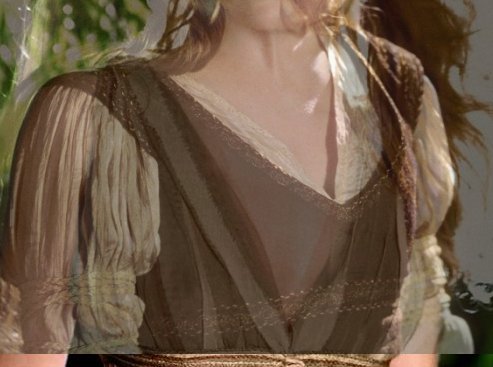
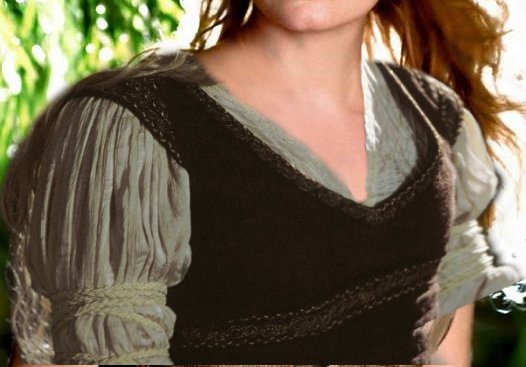
Do some clean-up erasing around the right shoulder and neck (lower the opacity a little so you can see where her neck is. Clean the neckline a little bit, too! You should now have something like this:
It still doesn't look particularly pretty. Time for Eowyn-hair. As with the clothes, it's helpful to find a picture already aligned correctly. Time for reflection on why manips are so frustrating. You can find the exact right position, and for some reason, the image in question simply will...not work. As I've been working on this manipulation for the tutorial, I've gone through at least three or four images trying to find the right hair. I finally found one that worked, but let this be a warning - if you try to go make an original manipulation after this one, be prepared for frustration. Anyway, the image that is working is this one. Not only does it work because it's turned at the right angle, but the hair is bushy enough around the top to look nice. First, rotate the whole image to the left at a 7-degree angle. Cut out the hair (25px feathering is good) all the way - it's a good idea to make two cuts, one for each side. Place them so they look like this:
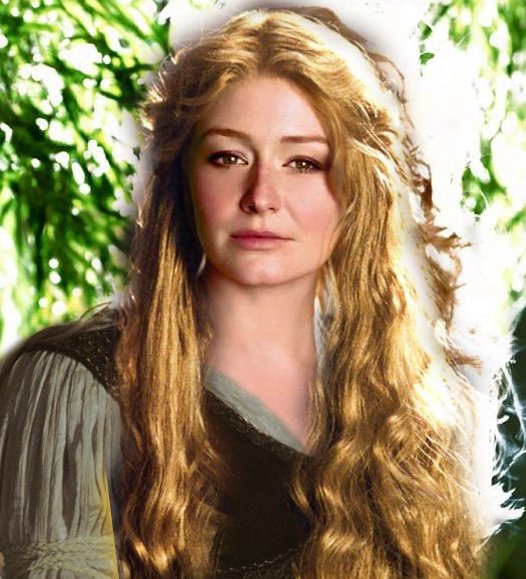
Do some cleanup erasing around the edges. Go to the layer of the original image, click on the eraser tool, and set the background color to somewhere around FEFDF9. Erase any original hair that's showing. Do more cleanup erasing. Now that you know how the hair falls, do some touchup erasing to get rid of the hair around her left shoulder. It should look like this:
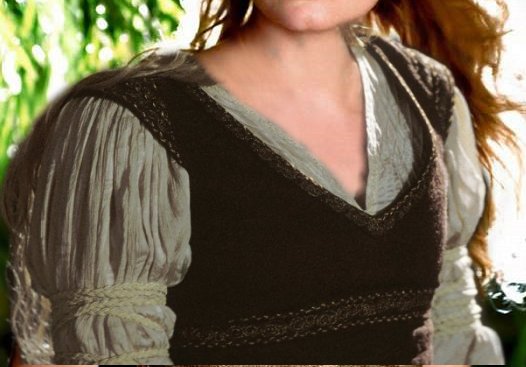
Her dress is too faded for this manipulation. Select one of the dress pieces (remember, there are two, so whatever you do to one, do to the other!) and set the brightness to 10 and the contrast to 30. Do the same to the other. Sharpen the base image. Use the lighten brush (35px size, 10 opacity) to go over her face (don't go over the mouth or eyes). Go over the same areas with the Saturation Down brush (same size, 15 opacity). Use the burn brush (25px size, 5 opacity) to go over the eyes, eyebrows, and lips. Go to both hair pieces and touch up any areas that are a little see-through with the clone brush (right click on the area and then left-click until it fills up). Set both hair pieces to -10 brightness and 5 contrast. This is your current image:
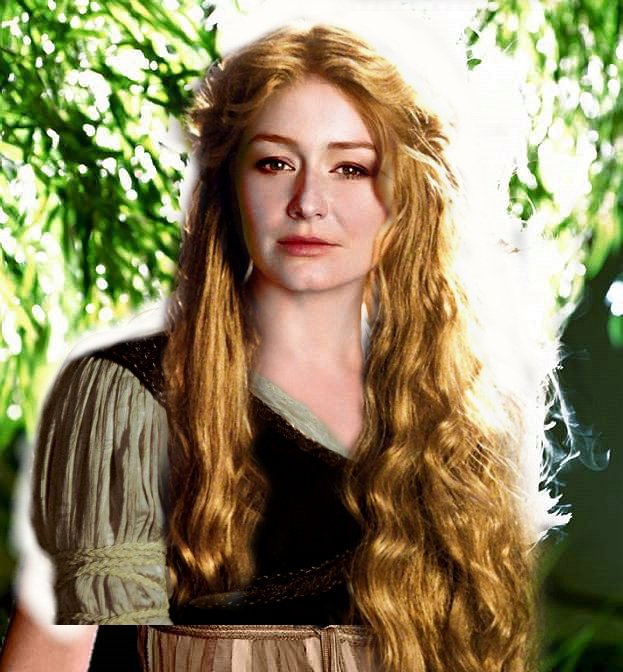
Time for a background. (If you don't want a background, skip this part.) Take this image, resize it so the height is 650 pixels, and copy it onto the image (it is very important to have the bottom layer selected!). Promote it to a layer and erase the facial area. Use the Color Balance tool (Color >> Adjustments) to set the red level to 100, the green to 85, and the blue to 39. Make necessary erasings around the hairline. Selecting the background again, use the dodge tool (size about 95, opacity anywhere from 5-10) around the area of the right side of the face. Use the burn brush (same settings) around the left side. Then use the Saturation Down tool on both areas. Go to Effects >> Blur >> Gaussian Blur, and set the radius to 1.00. It should now look like this:
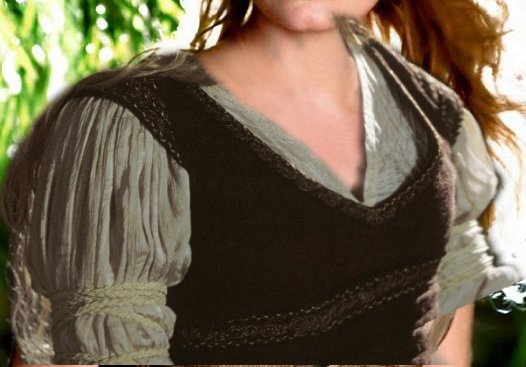
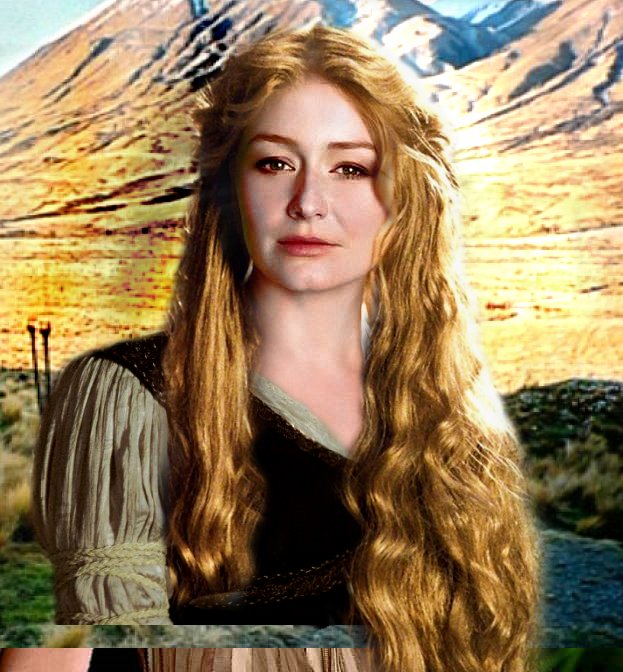
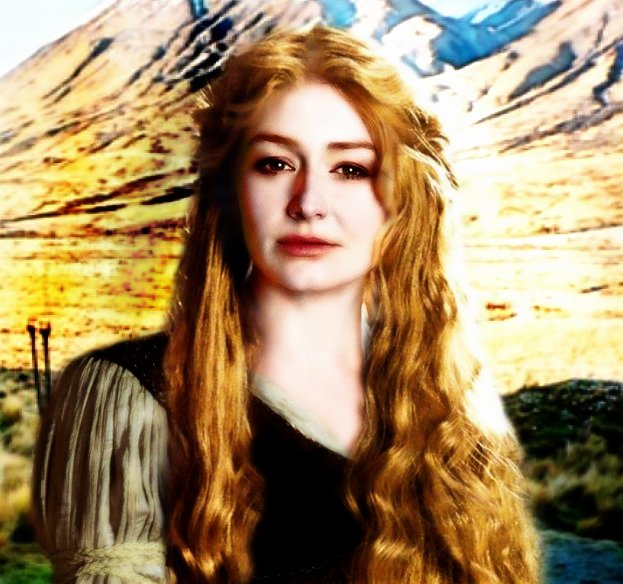
Time to make it look pretty :) Merge all the selections (you may want to save it before merging as a PSP or PSD file so you can change it later). Crop it right above where the hair on the left side ends. Duplicate the layer. Set your foreground color to white, the layer blend mode to Screen, and go to Effects >> Artistic Effects >> Hot Wax Coating. Give it a Gaussian Blur with a radius of 3.00. Duplicate the layer, but set the blend mode to Soft Light. Your image now looks like this:
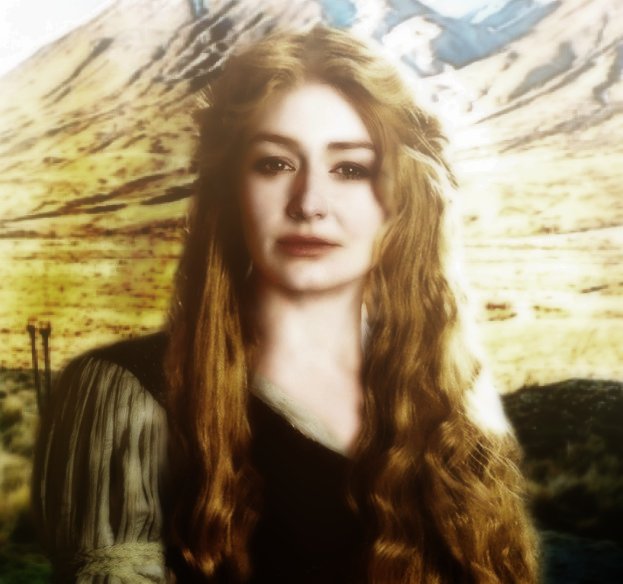
Tada! You're done! However, if you're not a big fan of bold colors and you have the Virtual Photographer plugin installed (available here), open it and set the effect to Faded. Duplicate the layer and set the blend mode to Multiply. Duplicate it again and give it a Gaussian Blur with the radius set to 5.00. It will now look like this:
And that's it. Just keep in mind that photo-manipping is a VERY time-consuming, frustrating, tedious process, and even though you can sometimes end up with stunning results, you may have to scrap a bunch of ideas, too! Enjoy! |